

How To Install Pavers On Gravel
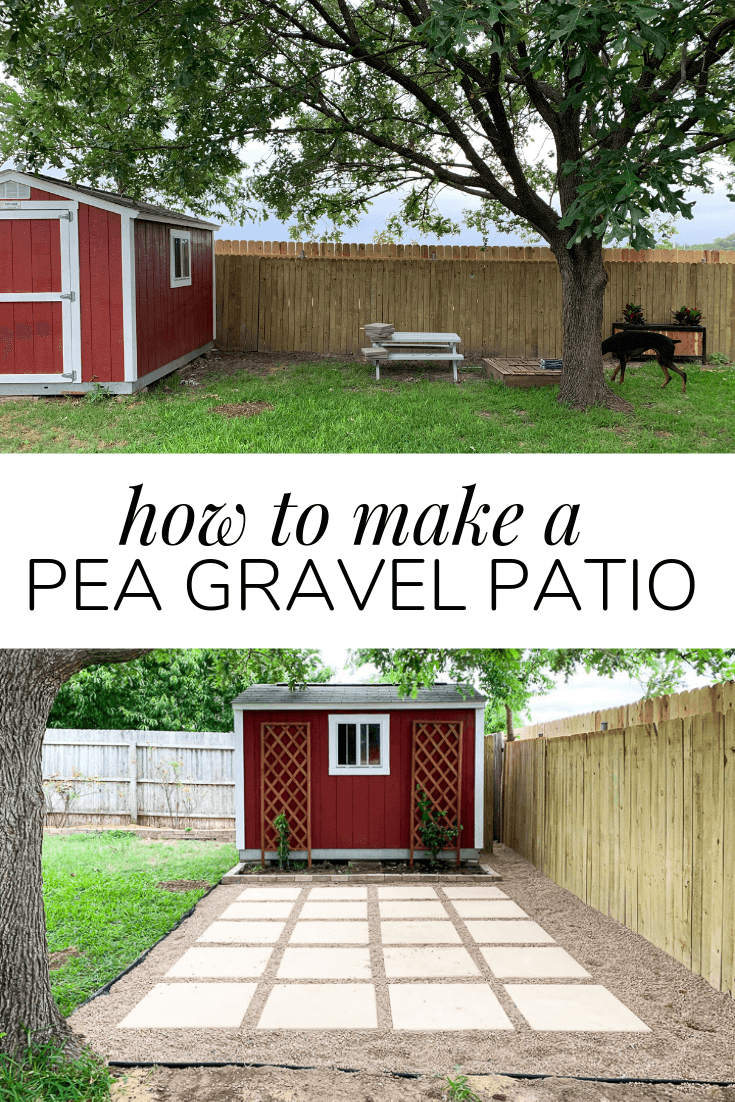
This pea gravel patio with large pavers is a cute, DIY-friendly project! Acquire all the details on how to lay pavers, how to install a pea gravel patio, and more!
Notation: This postal service was originally published in June of 2022. Information technology's being re-published and updated in an endeavor to put a spotlight on some fun, older projects y'all may have missed the kickoff time effectually!
Y'all, I built a patio.
I DID THIS! By myself! Can you believe it?!
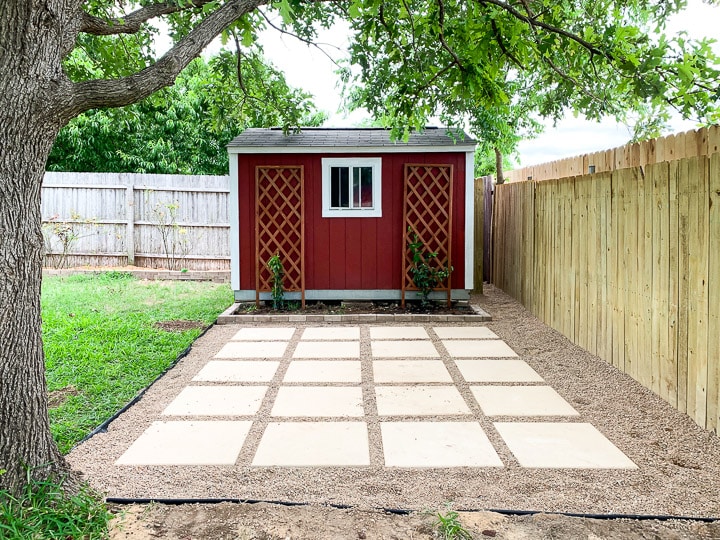
This little corner of my yard used to be completely empty and boring, and now it'southward functional and beautiful. I keep pinching myself over the whole thing because I still can't believe I did information technology.
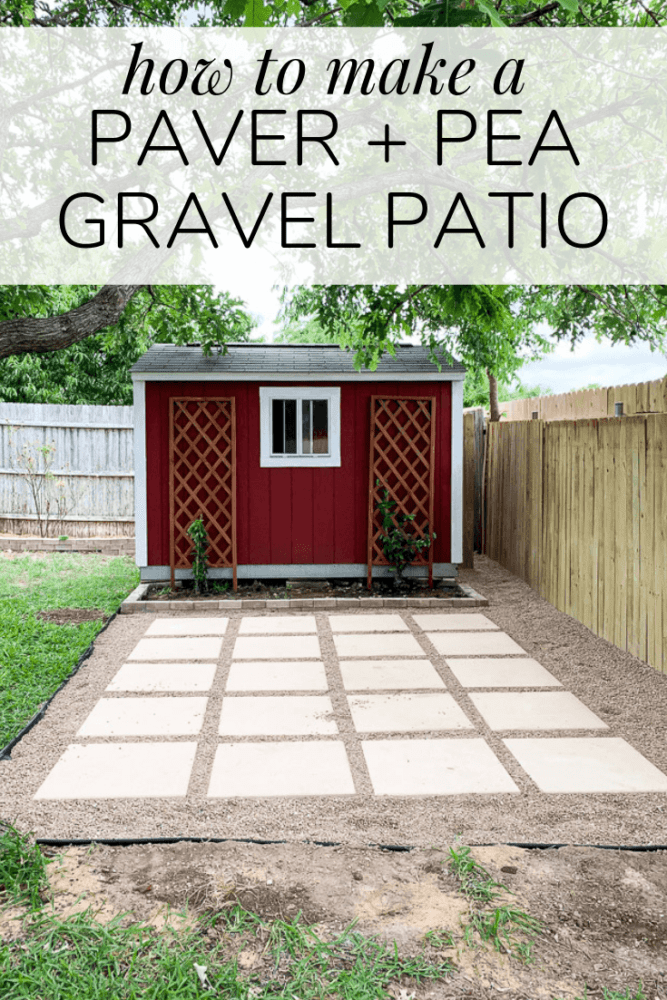
This project is part of a larger backyard makeover – I had my audience vote on what kind of patio nosotros should do in our backyard – The paver and pea gravel combo won by a landslide, and I ate, slept, and breathed all things patio until it was done!
I shed claret, sweat, and tears over this project, and I'g simultaneously incredibly proud of it and also don't ever want to make some other patio once again.
I mean, until I forget how hard it was and decide it'south fourth dimension.
This post will detail every single step I took to build this DIY paver and pea gravel patio. If you'd like to run across information technology styled, click here for that reveal! And, be sure to read all the mode to the bottom for all of the other posts in this backyard makeover series – it's a doozy!
Let's do this matter.
This postal service contains chapter links. Click hither to read my full disclosure policy.
how to make a DIY paver and pea gravel patio
Tools + materials
- Shovels
- Gloves
- Nylon string + grading stakes
- Line level
- Landscape cloth + staples
- Paver base (encounter my note below)
- Leveling sand
- Tamper
- 24X24 pavers
- Pea gravel
- Landscape edge
Pace One: determine the size and shape of your patio

Your outset step is to figure out where y'all desire to identify your patio and exactly how big you want it to exist. We had this perfect expanse next to our shed where grass never grew, and we knew if we put a patio there information technology would make this corner of our yard usable again.
Considering of the natural landscape of our yard, we had a pretty adept outline already – nosotros wanted our patio to run the length of the shed widthwise, and from the shed over to the tree. Of class, the sky'south the limit when y'all're sizing out your patio – just remember the bigger information technology is, the more piece of work you'll have to do!
Once yous've determined the sizing, use your stakes and string to frame out the area where you desire the patio to be. You'll apply this to determine both the size and the depth of where you need to dig, so you lot want to take the fourth dimension to ensure your lines are directly and level. You can apply a straight line in your 1000 (similar the debate) to mensurate off of to exist sure the line is completely straight.
Place the stakes at each corner, so tie the cord to the stakes to create an outline. Use the line level to brand sure the strings are placed evenly.
In one case you've framed out all iv sides (or, in my case, merely ii since I was using the fence and shed equally the other ii sides), add a line of cord going diagonally across both sets of corners. This volition assist you level out the middle of the patio (I'll detail that in a second).
In one case you lot take the infinite marked off, you're ready for the difficult part: digging.
Footstep Two: Dig out the area of the patio
To make up one's mind how deep yous need to dig, take the height of your pavers (ours are 2″), and add 1-2 inches for sand PLUS about 3 inches of paver base.
Here'south a quick notation: depending on the surface area you alive in and how much use your patio will get, you may be able to skip the paver base. I absolutely do not recommend this if you're doing a full paver patio, if y'all live in an area that gets hard freezes regularly, or if this volition be the main patio in your 1000 and therefore see a ton of traffic. Merely, since our area almost never freezes, our soil drains actually well, and this patio will only meet light utilise, we felt proficient well-nigh doing the sand but. My dad has done a ton of landscaping projects like this over the years, and he gave me the advice to skip it, and so I'll just blame him if it falls apart.
I'm kidding. Mostly.
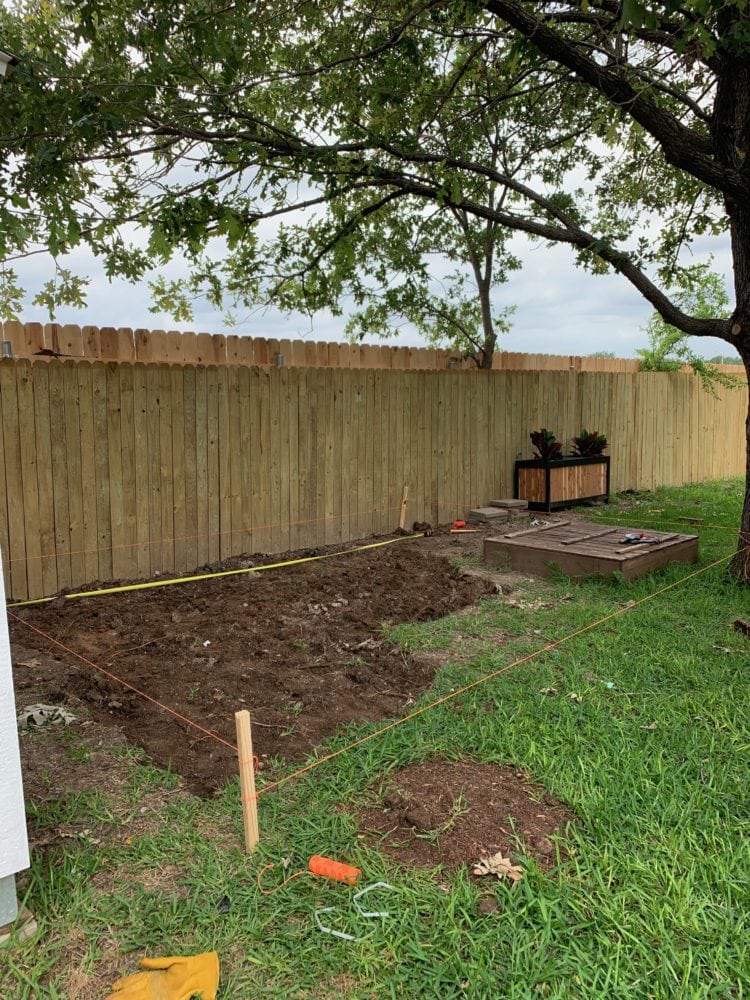
The digging is definitely the most back-breaking role of the entire process, and you'll want to quit at least a hundred times. Just put on a skillful podcast, tune out the world, and keep on digging.

You may notice that we hadn't placed the string yet in the higher up photo. We didn't want to work around it (I'm clumsy and kept kick it), so we dug out the main area, and so laid it to get the edges and determine the spots where we needed to dig deeper. This is a perfectly fine society to work in besides, if you find that easier!
Hither's a quick rundown of how you'll use the string border you lot've put upwardly:
- Use the string as a guideline for where y'all should dig the edges of the patio. If you follow along the straight line of the string, you'll be certain to end up with perfect lines and square corners.
- Y'all'll also want to use the cord to make certain the area you're earthworks for the patio out is level. Grab your measuring tape and measure from the cord down to the basis where you lot've dug. Yous'll desire that measurement to be consequent across the entire patio. Obviously, you can't check every inch of the patio, but you can brand sure that the majority of it is dug to the same depth, and once you've got all of the areas near the string, it'll be easy to see where the high and low spots are.
Pace 3: Lay Landscape Fabric
Next up, I took some mural fabric and laid it out across the entire patio expanse. This isn't a totally necessary step (y'all've already dug up all of the grass at this point and are most to lay down tons of other things that will kill any remaining grass), only I figured it was a super quick pace that might save me some weeding downwardly the line.
Information technology only takes a few minutes to coil out the fabric and push in the textile staples. Honestly, this is the easiest stride in the entire procedure and you probably want to practice it just so that you can cross something off the list speedily and easily.
Step Four: Lay Paver base + Sand
Once the full patio area is dug out, install your mural border. Nosotros went with a flexible plastic 1, but they also sell nicer metal ones that are a bit more sturdy! We haven't had any issues with rocks escaping the patio, and so the plastic stuff seems to be working just fine!
If yous're doing paver base, you'll want to put down near two-3 inches of that hither. Like I noted earlier, we didn't use it for our project, and then I don't have photos of that. Please exist certain to do your inquiry before deciding to skip this, though – nosotros feel confident that our patio will hold up just fine without it, just make sure to talk to someone in your expanse with experience earlier making any decisions.
Our next step was to lay the sand. Yous should use physical sand (I've too seen it called leveling sand) for this step – I highly recommend you find a local landscaping supply company to get it from. For us, it was about 1/3 of the cost of just buying bags of sand at the hardware shop! We had them deliver it directly to our house – they simply dumped it in the driveway for usa and I used a wheelbarrow to bring information technology back to the g.

After you've laid virtually ane″ of sand, use your tamper to compact all of the sand around the patio. This is where things can become tricky – you aren't supposed to step on the sand at all once it's been compacted, so you may have to re-tamp information technology as you piece of work.
The goal is that by the fourth dimension yous're done tamping downward the sand, it's all compacted and level. If this sand is still loose, information technology won't human activity as a proficient base for your pea gravel patio. So, take your fourth dimension here!
One pace that we chose to skip that I really regret is screeding the sand before moving on to laying pavers. I thought it would be easy to accommodate as we went, only I actually wish I had taken the time to do this (specially because it's non that hard!). Read below for the details on that!
Here's a quick rundown of how to screed your patio:
- Lay lengths of PVC pipe (I've seen it done with 2X4s too) about every five anxiety across the patio (this is supposed to exist done on peak of your paver base, before laying sand). Be certain they're level! Whatever material you choose, brand sure it's almost the same pinnacle every bit you lot want your sand to be (so, if you want 1″ of sand, cull a material about one″ thick!).
- Fill the patio area with your sand and spread it all out.
- Grab a 2X4 and run it forth the top of the pipes to pull off whatsoever excess sand. Be sure to expect as y'all piece of work to be sure there aren't whatsoever areas so low that the 2X4 isn't touching.
- You should be able to pull out the pipes once yous're done, and use a small trowel to fill in the spots where they were.
With this step, you don't demand to also tamp down the sand, equally the screeding does a adept job of compacting it. Yous will, however, want to brand sure yous've compacted your base layer if you're using that!
Instead of doing this, we just added more sand to low spots and dug out high spots as nosotros worked (re-tamping each time). It was more work than it should have been, so I definitely wish we'd taken the time to screed!
I make these mistakes and so you don't have to.
Pace Five: Lay pavers
Now, you're ready to start laying your pavers! If you've done everything properly and your ground is totally level, this volition be pretty quick! But be sure to mensurate the altitude betwixt each paver (we did 4″), and make sure that you're laying in a direct line. Some other cord tin can help if you desire to utilise that to guide your lines!

Check that each paver is level, and that it'southward level with all of the pavers side by side to it.
Step Six: Add together Pea Gravel
Once all of your pavers have been placed, it's time for the pea gravel!
We too got our pea gravel from the local mural shop. It was about $50 for a cubic k of pea gravel, which was enough to do all of the (12×15) patio, turn Jackson's former sandbox into a rock box, and add a sparse layer of gravel effectually the side and back of the shed. For contrast, purchasing that much in but bags from the hardware store would have cost near $215. We picked it up in our truck, but even if nosotros had called to have the rock delivered (which is about a $50 fee), nosotros would have saved a ton of money!
This function of the project was satisfying, surprisingly fast, and incredibly back-breaking and exhausting (I literally popped a rib out of place while working). I did it all past myself in nearly 2.5 hours – I just loaded the wheelbarrow up, brought it to the backyard, dumped it onto the patio, and used a combination of a big broom and my rake to spread it around until it was level.

You'll find that the pea gravel doesn't always stay where it's supposed to (you're shocked, aren't you?!), and so just take the fact that yous'll accept to sweep the patio regularly if you want it to stay looking nice and neat. It only takes a few minutes, so it doesn't bother u.s. at all but if you think that constantly having rocks creep upwardly onto your pavers will make you twitchy, this might not exist the project for you.
I will annotation that while nosotros've had rocks hop upward on the pavers pretty regularly, we've had almost no problems with the pea gravel escaping the actual perimeter of the patio. It's stayed in place and out of our grass very well!
After your pea gravel is in place, yous're Washed!
You lot can immediately load upward your patio with your furniture, or you lot can do every bit I did and take a moment to commemorate the monumental accomplishment of building a pea gravel patio all by yourself.


Sometimes you've but gotta celebrate, right?!
Desire more than backyard makeover details?
This DIY pea gravel patio was part of a much larger effort to give the entire outside of our home a major upgrade. Here are all of the posts in that serial!
- The styled pea gravel patio
- How I added a mini grill patio off of this i
- All the details on how I painted our metal canopy on the covered patio
- DIY exterior found wall (on the side of the house!)
- How to line a flower bed
- All the details on painting our cute red shed
- How I painted the unabridged exterior of our house
- And finally, this postal service has the big reveal of the entire lawn!

Source: https://www.loveandrenovations.com/pea-gravel-patio/
Posted by: conklinlacquit79.blogspot.com
0 Response to "How To Install Pavers On Gravel"
Post a Comment